Table of Contents
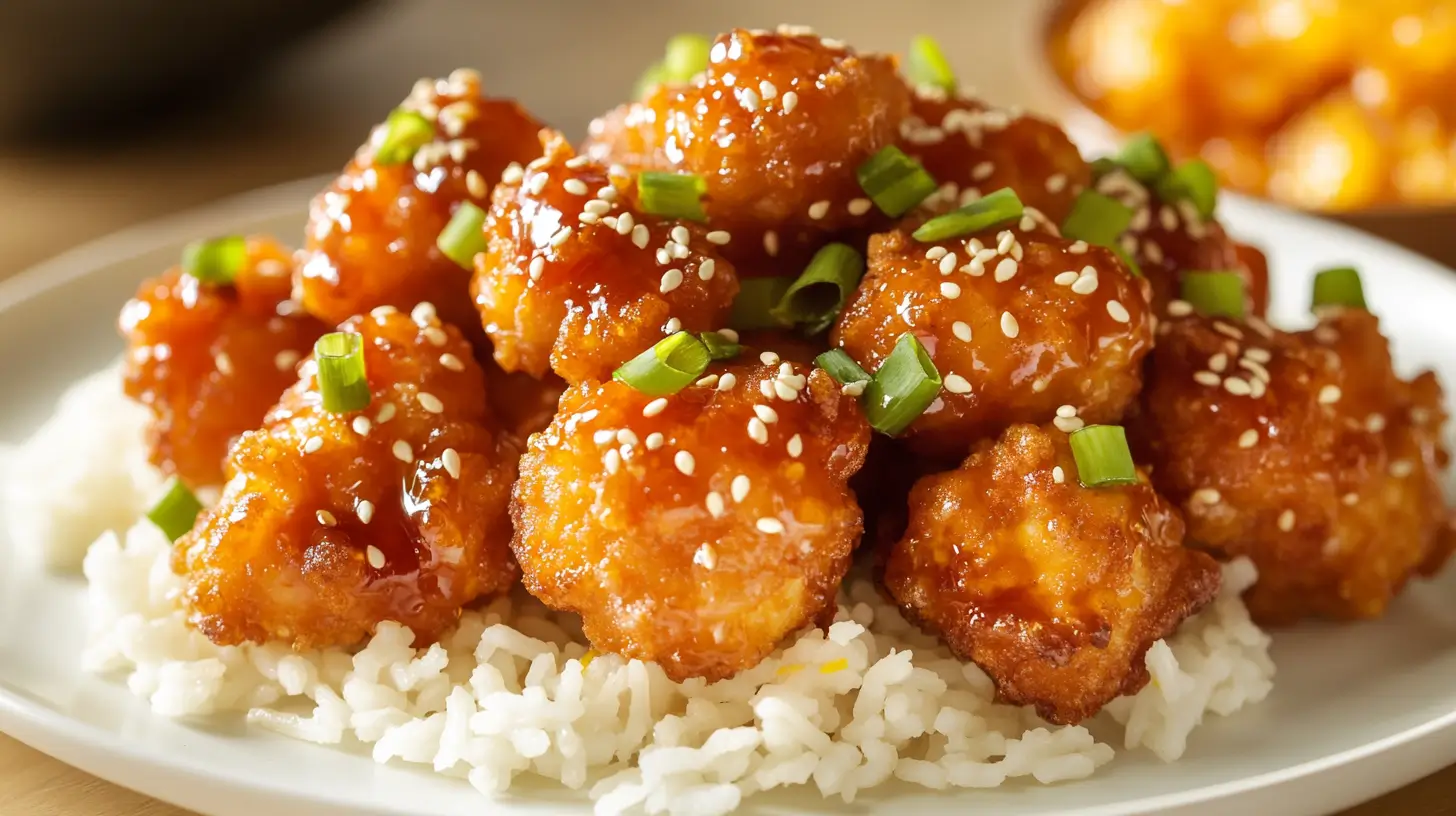
This Easy Orange Chicken Recipe is the ultimate takeout-fakeout, bringing bold, citrusy flavors straight to your kitchen. Imagine crispy fried chicken bites, golden and crunchy, tossed in a sweet and tangy orange sauce packed with fresh orange juice, garlic, ginger, and soy sauce. The sticky glaze clings to every crispy piece, creating the perfect balance of savory, zesty, and slightly sweet flavors.
The best part? This Easy Orange Chicken Recipe is quicker, healthier, and tastier than takeout, with no artificial flavors or heavy grease. You can customize the sweetness, spice, and crispiness to suit your taste. Serve it over fluffy rice, stir-fried vegetables, or in lettuce wraps for a low-carb option. If you’ve been craving Chinese orange chicken, trust me—this easy, restaurant-style dish will become your new favorite go-to meal. Better than takeout and ready in just 30 minutes!
If you love making restaurant-quality meals at home, this Easy Orange Chicken Recipe is perfect for you. It delivers crispy, golden chicken tossed in a sweet and tangy orange sauce that’s better than takeout! Plus, it’s quick and easy to prepare, making it ideal for busy weeknights. If you’re looking for more delicious homemade meals, check out Braised Chicken Recipe for another must-try dish!
Why You’ll Love This Easy Orange Chicken Recipe
- Better Than Takeout – This homemade Easy Orange Chicken Recipe is fresher, healthier, and more flavorful than restaurant versions.
- Crispy & Flavorful – Every bite is perfectly crispy on the outside while staying juicy inside, all coated in a sweet, tangy, and savory orange sauce that’s absolutely addictive.
- Quick & Easy – This easy orange chicken recipe comes together in just 30 minutes, making it a perfect weeknight dinner when you need something fast but satisfying.
- Customizable – Want it spicier? Add red pepper flakes. Need it sweeter? Adjust the honey or brown sugar. Prefer a healthier version? Bake or air-fry the chicken instead of deep frying.
- Pairs with Anything – Serve your crispy orange chicken over steamed rice, fried rice, or even noodles for a complete meal. Add some stir-fried veggies for an extra nutritious boost!
Ingredients for Easy Orange Chicken Recipe
To make the best Easy Orange Chicken Recipe, you’ll need:
- Chicken breast or thighs – Boneless, skinless, and cut into bite-sized pieces for even cooking.
- Cornstarch & Flour – The secret to achieving that light, crispy coating.
- Eggs – Helps the breading stick to the chicken.
- Soy sauce – Adds depth and umami to the dish.
- Fresh orange juice & zest – The star ingredients for that bright, citrusy flavor!
- Honey or brown sugar – Balances out the tanginess with a touch of sweetness.
- Garlic & ginger – Essential for adding bold, aromatic flavors.
- Rice vinegar – Gives the sauce its signature tang.
- Red pepper flakes – Optional, but adds a nice kick if you like a bit of heat.
- Sesame oil – A little goes a long way in bringing rich, toasty flavor.
- Green onions & sesame seeds – For garnish and a fresh finishing touch.
You’ll find the complete ingredient list with measurements in the recipe card below.
How to Make Easy Orange Chicken Recipe
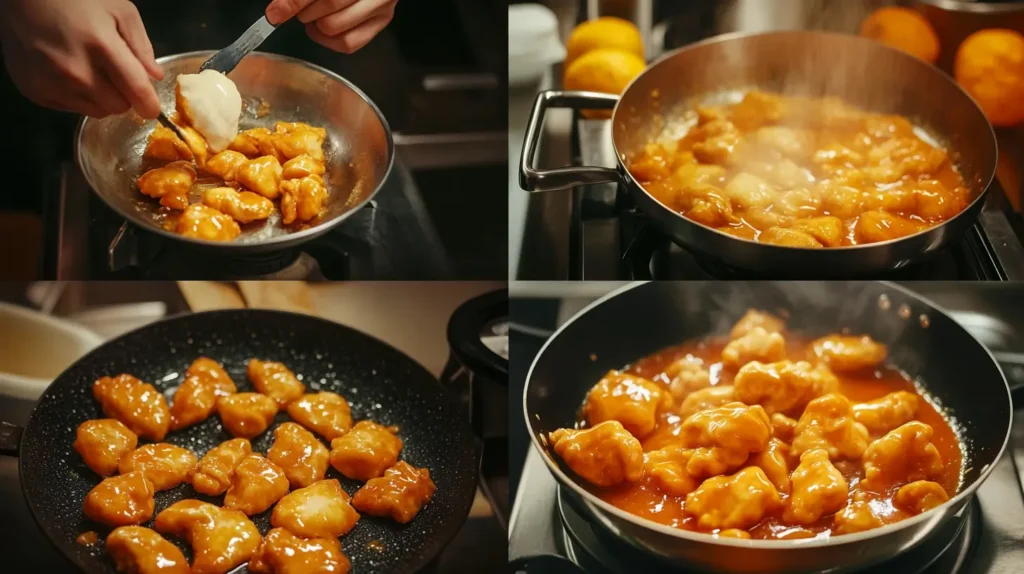
Step 1: Prep the Chicken
Cut the chicken into bite-sized pieces. In a bowl, whisk eggs. In a separate bowl, mix cornstarch and flour. Dip the chicken pieces into the egg, then coat them in the flour mixture.
Step 2: Fry Until Crispy
Heat oil in a pan over medium-high heat. Cook the chicken in batches until it turns golden brown and crispy. Remove and drain on paper towels.
Step 3: Make the Orange Sauce
In a saucepan, whisk together orange juice, zest, soy sauce, honey, garlic, ginger, and rice vinegar. Simmer over medium heat for a few minutes.
Step 4: Thicken the Sauce
Combine cornstarch with water to form a slurry, then slowly stir it into the sauce until it thickens.
Step 5: Toss the Chicken in Sauce
Add the crispy chicken to the sauce, tossing to coat every piece in that glossy, delicious orange glaze.
Step 6: Garnish & Serve
Top with sesame seeds and chopped green onions. Serve hot over rice or with steamed veggies.
Pro Tips for Making Easy Orange Chicken Recipe
- Use Fresh Orange Juice & Zest – For the most vibrant, authentic orange chicken flavor, always use freshly squeezed orange juice and zest. Bottled juice won’t give you the same bright, citrusy taste.
- Double-Coat for Extra Crispiness – Want extra crispy orange chicken? Double dip the chicken in the cornstarch and flour mixture before frying. This creates a thick, crunchy coating that holds up beautifully to the sauce.
- Don’t Overcrowd the Pan – Fry the chicken in batches to keep the oil temperature consistent. Overcrowding leads to soggy, unevenly cooked pieces. For the best crispy fried chicken bites, give them space to cook properly.
- Air-Fry or Bake for a Healthier Version – Skip the deep frying and air fry at 375°F for 12-15 minutes or bake at 400°F for 20 minutes for a lighter orange chicken recipe without sacrificing crunch.
- Thicken the Sauce Properly – Mix cornstarch with water before adding it to the sauce. This prevents clumping and helps you achieve that perfect sticky orange sauce that coats every bite.
- Toss the Chicken at the Last Minute – To keep the crispy chicken from getting soggy, toss it in the sweet and tangy orange sauce just before serving. If you’re meal prepping, store the sauce and chicken separately.
- Add a Kick of Spice – Love a little heat? Stir in some red pepper flakes, sriracha, or chili paste for a spicy orange chicken variation that’s extra bold and flavorful.
- Garnish for the Perfect Finish – Top with sesame seeds and chopped green onions for a restaurant-style look and an extra boost of flavor.
How to Serve Easy Orange Chicken Recipe
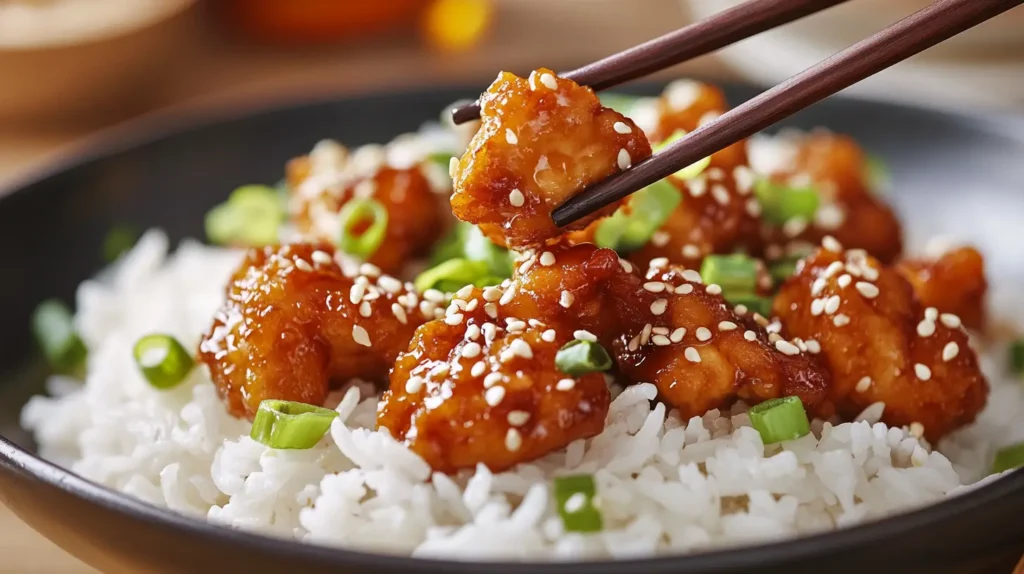
- Classic Takeout Style – Serve this crispy orange chicken over a bed of steamed white rice, jasmine rice, or brown rice to soak up that sweet and tangy orange sauce.
- With Fried Rice – Pair with homemade fried rice for the ultimate better-than-takeout orange chicken meal. Try it with vegetable fried rice, chicken fried rice, or even cauliflower fried rice for a low-carb option.
- With Noodles – Toss this sweet and crispy orange chicken with lo mein, chow mein, or rice noodles for a delicious Chinese-style dish.
- Low-Carb & Keto-Friendly Option – Want a healthier way to enjoy this dish? Serve it with cauliflower rice, stir-fried veggies, or in lettuce wraps for a low-carb orange chicken option.
- As an Appetizer – Serve these crispy fried chicken bites as an appetizer with extra orange sauce for dipping—perfect for parties, game nights, or family gatherings!
- With Stir-Fried Vegetables – Balance out the sweet and savory orange chicken with a side of broccoli, bell peppers, snap peas, or bok choy for added nutrition and crunch.
- Orange Chicken Bowl – Make a power bowl by layering orange chicken, steamed rice, sautéed veggies, and a drizzle of extra sauce for a complete, satisfying meal.
- In a Wrap or Sandwich – Try stuffing this crispy orange chicken into lettuce wraps, tortillas, or even a sandwich bun for a fun, handheld twist on the classic dish!
Make Ahead and Storage
Storing Leftovers
Store any leftover orange chicken in an airtight container in the fridge for up to 3 days.
Freezing
For best results, freeze the crispy chicken separately from the sauce. Reheat the chicken in the oven at 375°F until crispy, then toss in the warmed sauce.
Reheating
- Oven: Bake at 350°F for 10 minutes.
- Air fryer: Heat at 375°F for 5 minutes for maximum crispiness.
- Microwave: Not recommended—it makes the chicken soggy.
FAQs About Easy Orange Chicken Recipe
Can I make this without frying?
Yes! You can bake the chicken at 400°F for 20 minutes or air-fry at 375°F for 12-15 minutes for a healthier version.
What can I use instead of cornstarch?
You can swap cornstarch for potato starch or all-purpose flour, but cornstarch gives the crispiest result.
Can I make the sauce ahead of time?
Absolutely! The orange sauce can be made 3-4 days in advance and stored in the fridge. Just reheat and toss with fresh, crispy chicken when ready.
Can I add veggies to this dish?
Yes! Bell peppers, broccoli, or snap peas go great with orange chicken. Just stir-fry them separately and toss them in at the end.
conclusion
This Easy Orange Chicken Recipe is the ultimate way to enjoy crispy, sweet, and tangy orange chicken at home. Bold flavors, crunchy coating, and a sticky orange glaze make this dish better than takeout. Whether you love Chinese orange chicken or need a quick homemade version, this easy, restaurant-style recipe will become your go-to. Crispy, flavorful, and ready in just 30 minutes—what’s not to love?
What makes this homemade orange chicken recipe stand out? It’s simple, quick, and customizable—you can make it as crispy, sweet, or spicy as you like. Plus, it pairs perfectly with steamed rice, fried rice, stir-fried veggies, or even noodles for a complete meal. If you’re looking for a healthier option, you can bake or air-fry the chicken for the same crispy texture with less oil.
Trust me, once you try this better-than-takeout orange chicken, it’ll become your new go-to weeknight dinner. Crispy, flavorful, and ready in 30 minutes—what’s not to love?
Print
Easy Orange Chicken Recipe
- Total Time: 25 minutes
- Yield: 4 servings
Description
This Easy Orange Chicken recipe is a game-changer! Crispy, golden chicken bites coated in a sticky, sweet, and tangy orange sauce—just like your favorite takeout but even better. It’s quick, simple, and packed with flavor, making it perfect for a weeknight dinner. Serve it over fluffy rice or alongside steamed veggies for a delicious homemade meal.
Ingredients
For the Chicken
- Boneless, skinless chicken breast – cut into bite-sized pieces
- Cornstarch – for coating the chicken, making it extra crispy
- Egg – helps bind the cornstarch to the chicken
- Salt & pepper – to season the chicken
- Oil – for frying (vegetable or canola oil)
For the Orange Sauce
- Orange juice – fresh is best for a natural citrusy flavor
- Soy sauce – adds depth and umami
- Brown sugar – for sweetness and caramelization
- Rice vinegar – balances the flavors with acidity
- Garlic – minced, for a savory kick
- Ginger – fresh, grated for warmth and spice
- Cornstarch slurry (cornstarch + water) – thickens the sauce
- Red pepper flakes (optional) – for a slight heat
Instructions
Prepare the Chicken
In a bowl, season the chicken with salt and pepper. Dip each piece into beaten egg, then coat evenly with cornstarch. Set aside.Fry the Chicken
Heat oil in a pan over medium-high heat. Fry the coated chicken pieces until golden and crispy, about 3-4 minutes per side. Remove and drain on paper towels.Make the Orange Sauce
In a saucepan, combine orange juice, soy sauce, brown sugar, rice vinegar, garlic, and ginger. Bring to a simmer over medium heat.Thicken the Sauce
Mix cornstarch with water to make a slurry. Stir it into the sauce and cook for 2-3 minutes until thick and glossy.Coat the Chicken
Add the fried chicken to the sauce, tossing well to coat every piece. Let it simmer for 1-2 minutes to absorb the flavors.Serve and Enjoy
Serve hot over rice or alongside stir-fried vegetables. Garnish with sesame seeds and green onions for extra flavor.
Notes
- For extra crispy chicken, double-fry the pieces by letting them rest for a minute after the first fry and then frying again for another minute.
- Want a healthier version? Bake or air-fry the chicken instead of deep-frying.
- Adjust sweetness and tanginess by modifying the amount of brown sugar and vinegar to taste.
- Make it spicier by adding more red pepper flakes or a dash of sriracha to the sauce.
- Prep Time: 10 minutes
- Cook Time: 15 minutes
- Category: Main Dish
- Method: Stir-fry
- Cuisine: Asian, Chinese-American
Nutrition
- Serving Size: 1 portion
- Calories: 400
- Sugar: 20g
- Sodium: 700mg
- Fat: 15g
- Saturated Fat: 3g
- Unsaturated Fat: 10g
- Trans Fat: 0g
- Carbohydrates: 45g
- Fiber: 2g
- Protein: 25g
- Cholesterol: 70mg
Keywords: orange chicken, crispy orange chicken, easy orange chicken, homemade orange chicken, Chinese takeout chicken, sweet and tangy chicken, orange sauce chicken

